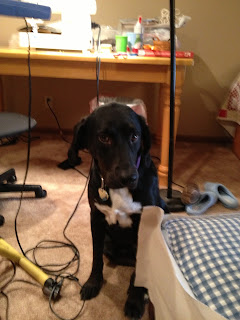
As you can see the check is dated and Harper left his mark on the ottoman. In this photo I have already taken the skirts off both the chair and ottoman.

Harper is our chocolate Lab. He is a totally laid back dog. If he could talk we are pretty sure he'd say "dude" a lot. But when we first got him he was a little curious when we left him alone. Thus the damage to the ottoman.
This is Ellie. She is a sweetie and keeps Harper on his toes. They both like to be next to me when I'm working on a project. But back to the project "slipcover".
A friend of mine was working on a slipcover herself and told me her secret. She purchased these painters drop cloth from Lowes. They are 6 X 9 and have no seams. Once washed and ironed the canvas is soft and it is going to be super durable. And they were only $9.99 each. I used 4 for both the chair and ottoman.
I started with the ottoman. I measured around the top and middle of the ottoman to find the approximate length of piping needed. One at a time I laid the piping on the fabric and cut 3" wide stripes, leaving a little extra fabric at the ends.
To repair the area Harper took a bite out of I added upholstery foam the size needed then covered it with batting and then covered that with a piece of cotton fabric I had. I hand sewed this to the ottoman. I cut a piece of the painters canvas the approximate size of the top.
At this point I cut strips for the sides, sewing them at the back corners to make it look more fitted.
Piping is really easy to make. Lay the cording in the center of the 3" strip and fold over with wrong sides together. Using a zipper foot on your sewing machine sew as close to the cording without running over it.
I sewed the piping to the top piece.
Then added the side piece.
The skirt was easier as I could use the old skirt as a pattern. Measure the height. Mine was 10" that gave me 1/2" seams and hem. Now measure the pleats. This skirt was in made with pleated sections and straight sections. The pleats went where the corners are. I measured each section and cut appropriately with a 10" height. Hem your fabric after cutting. Now iron in your pleats just as they were on the original. I believe my pleats were 2 1/2" folds making the entire pleat 5". I sewed the raw edges using a zig zag stitch. you could also do an other the edge stitch or if you have a serger you could use that.
I pinned this with right sides together right on the ottoman, making sure the piping was sewn in as I went. This would have been easier if I had sewn the piping to the skirt and then added it to the top portion.
Ottoman complete!! Now on to the chair.
I took several pictures of the cushions to remember how to put it back together. The seat and back cushion each had a zipper that I reused. Once photos were taken I started ripping the seams out. Iron the pieces and use them as patterns to cut the new fabric.
Making the piping in the same fashion as for the ottoman, sew the pieces together using the pictures taken before disassembling the original.
After the bath remodel we went on vacation to relieve all the stress from a remodel. Oh I wish we were there again. The beaches of Florida are wonderful.
Using the upholstery I cut pieces that were approximate.
Pinning right sides together to fit sew piece by piece.
I chose to make an opening down the back. Make sure these pieces are big enough to over lap a bit and to hem. I will be using buttons to close this.
The original chair did not have piping around the armrests but I felt it made a good tailored look.
This shows how I placed the slipcover on backwards to make sure it was a tight fit when pinning.
As I did with the skirt of the ottoman I made the skirt to the chair in the same manner. Sorry, I didn't take a picture of the button holes and buttons I attached. The buttons I used are 1". My machine has a button holer attachment so it makes it super easy to make them.
I couldn't be happier with how they turned out.
Remind me to tell Harper it's not food. :)


2 comments:
You did a fabulous job on this and should be very happy:) hope it's holding up well for you and that the dogs have left it alone!
Thanks Michele! The dogs have left it alone. ;) Every once in awhile I can tell Harper has taken a nap in the chair. But overall they are good dogs!
Post a Comment