 I wandered around the garden centers and craft stores and could not find a little American flag to fit on my garden stand. So I decided to make one. Here's what you'll need... 1/4 yard red fabric, 1/4 yard white fabric, 1/8 yard blue fabric, thread ( I used white), scissors or quilters mat & rotary cutter and a sewing machine. My fabric is 100% cotton. An outdoor fabric would work best as it will hold up to the elements better. Wash and iron your fabric. I folded my fabric in half to cut two pieces at a time.
After folding in half trim selvages even.
Cut 2" strips lengthwise.
From your 2" strips cut 2 (double layered)- 18 1/4" long & 2 (double layered)- 11 3/4" long. Do this with both the red and the white fabric. You should now have 4 strips 18 1/4" long and 4 strips 11 3/4" long in both the red and white fabrics. I'm sorry I didn't take a picture of the strips to show you. (Things a blogger needs to learn) Set your red and white strips aside and grab the blue fabric you have prewashed and ironed. Fold in half so you are cutting 2 at a time. Trim selvages if needed. Cut a 6 1/2" X 7" piece. Set this aside. Remember we are constructing a front side and a back side of the flag. So now you will have 2 blue fields.
We are ready to assemble our flag.
With right sides together stitch 1- 18 1/4" red strip lengthwise to 1- 18 1/4" white strip. I used 1/4" seams for all of this project.
Press seams toward darker color fabric.
Now add another 18 1/4" strip of the opposite color. Just remember you want your strips to be red, white, red, white. I quilt so am using quilting techniques. When you piece strips or pieces of fabric for a quilt you switch direction your stitching goes. So we'll say we ended the first section of 2 pieces at the bottom. When you add your 3rd piece stitch from the bottom to the top. then on the 4th piece you'll stitch top to bottom again. This makes the pieces lay flat and not pucker. So now you should have a section of red and white 18 1/4" strips sewn together. Repeat this step with the other 18 1/4" strips for the other side of the flag.
Now using this same process sew your 11 3/4" strips together.
Now it's time to add our field of blue to each 11 3/4" section. Match up the 6 1/2" length to the strips 6 1/2" width. Sew together.
Don't worry if your strips are not the exact same length or your field of blue hangs over a little. This will all be fixed in later steps.
Now sew blue field/stripes section to longer stripes section. You now have achieved the above. ***NOTE***When sewing the opposite side the blue field will want to back the other blue field, white to white and red to red so piece accordingly. If the edges that are a little longer than others bug you, you can trim them up.
Take both sides of your flag and with right sides together match the blue field so it backs to the blue field and red stripes to red and white stripes to white. Using a 1/4" seam again, sew starting 2" from the top of the flag down that side, across the bottom and back up the other side stopping 2" from the top. Turn flag right sides out and press.
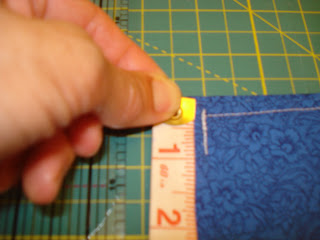
Press under unsewn area 1/4" as shown in the picture below.
Pin flag opening together. Top stitch around entire flag leaving a 3/4" opening on each side 1" down from top.
Being careful not to stitch your opening closed, top stitch your flag to your liking. I choose to stitch 2 rows 1/4" apart around the flag. Then I stitched in the white stripes 1/4" from their opposing fabric. And finally to reinforce where the bar goes thru the flag I sewed across the flag top and bottom of opening for the bar. You could get some spray that would make your flag water repellant to help its lifespan. Hang your flag with pride! You did it! Happy 4th of July! Linda


2 comments:
Love the flag. I could use one that size.
Thanks Brenda, Because you are my favorite twin sister I may make you one for our birhtday!!!
Post a Comment