New Recipe Wednesday
It's Spring and I have been busy in the flower beds and vegetable garden. I can stay out there for hours and enjoy every minute of weed pulling, ground tilling and planting. My other loves are sewing and creating. Cooking typically is not what I love to do. But now and then we all have to try a new recipe. So I had time tonight for one of the quickest recipes ever to make. Make this in the oven or on the grill.
Italian Chicken in Foil
aluminum foil
4 skinless boneless chicken breast halves
4 tsp olive oil
salt and fresh ground black pepper to taste
minced garlic your preference, small amount if you are not a garlic lover. Alot if you love garlic.
1 red onion
1 green bell pepper
1/3 cup Zesty Italian Dressing
Preheat oven to 425 degrees.
Tear off a piece of foil that is big enough to have chicken to be wrapped in. Like a sleeping bag for chicken.
Place chicken on foil. Drizzle with olive oil. Season with salt and pepper to taste.
Slice onion and bell pepper. Place them over the chicken. Sprinkle with minced garlic.
Fold up the foil to cover chicken and seal all sides. Place on baking sheet if cooking in oven. Or place on grill.
Bake for 20 minutes. You will know when it is done. The foil will puff up like a balloon if you have sealed it well.
Next time I make this I plan to use red bell pepper instead of green, to make it sweeter.
You can also add julienned carrots. Or other herbs to your liking. I may try a basil leaf.
Now, if you are feeding an army go ahead and make this recipe as is. But I was the only one at home tonight so, I took one chicken breast, drizzled with oil, added the amounts of vegetables I wanted and cooked as is. Delicious! I just watched the foil and when it was puffed up like a balloon, I took it out...dinner is served.
Enjoy!
Linda
Wednesday, May 13, 2015
Wednesday, May 6, 2015
Three Cheese Chicken Penne Pasta Bake
New Recipe Wednesday
I loved the Pasta recipe I shared with you a few weeks back but then I came across this gem. I think you'll like it even better!
Three Cheese Chicken Penne Pasta Bake
1 1/2 cups multigrain penne pasta, uncooked
1 9 oz. pkg fresh spinach leaves
1/2 lb boneless skinless chicken breasts, cut into bite size pieces
1 tsp basil leaves
1 jar spaghetti sauce
1 14.5 oz can diced tomatoes, drained
2 oz. cream cheese
1 cup shredded mozzarella cheese, divided
2 tbsp grated parmesan cheese
Heat oven to 375 degrees. Cook pasta as directed on package. adding spinach to the boiling water for the last 1 minute.
Cook and stir chicken and basil in large nonstick skillet on medium-high heat 3 minutes. Add spaghetti sauce and tomatoes; bring to a boil. Simmer 3 minutes or until chicken is done. Stir in cream cheese.
Drain pasta mixture; return to pan. Stir in chicken mixture and 1/2 cup mozzarella cheese. Spoon into 2 quart or 8 inch square baking dish.
Bake 20 minutes. Sprinkle with remaining cheeses. Bake 3 minutes.
Make 6 servings. Enjoy!
Linda
I loved the Pasta recipe I shared with you a few weeks back but then I came across this gem. I think you'll like it even better!
Three Cheese Chicken Penne Pasta Bake
1 1/2 cups multigrain penne pasta, uncooked
1 9 oz. pkg fresh spinach leaves
1/2 lb boneless skinless chicken breasts, cut into bite size pieces
1 tsp basil leaves
1 jar spaghetti sauce
1 14.5 oz can diced tomatoes, drained
2 oz. cream cheese
1 cup shredded mozzarella cheese, divided
2 tbsp grated parmesan cheese
Heat oven to 375 degrees. Cook pasta as directed on package. adding spinach to the boiling water for the last 1 minute.
Cook and stir chicken and basil in large nonstick skillet on medium-high heat 3 minutes. Add spaghetti sauce and tomatoes; bring to a boil. Simmer 3 minutes or until chicken is done. Stir in cream cheese.
Drain pasta mixture; return to pan. Stir in chicken mixture and 1/2 cup mozzarella cheese. Spoon into 2 quart or 8 inch square baking dish.
Bake 20 minutes. Sprinkle with remaining cheeses. Bake 3 minutes.
Make 6 servings. Enjoy!
Linda
Wednesday, April 29, 2015
Biscuit Cinnamon Roll
New Recipe Wednesday
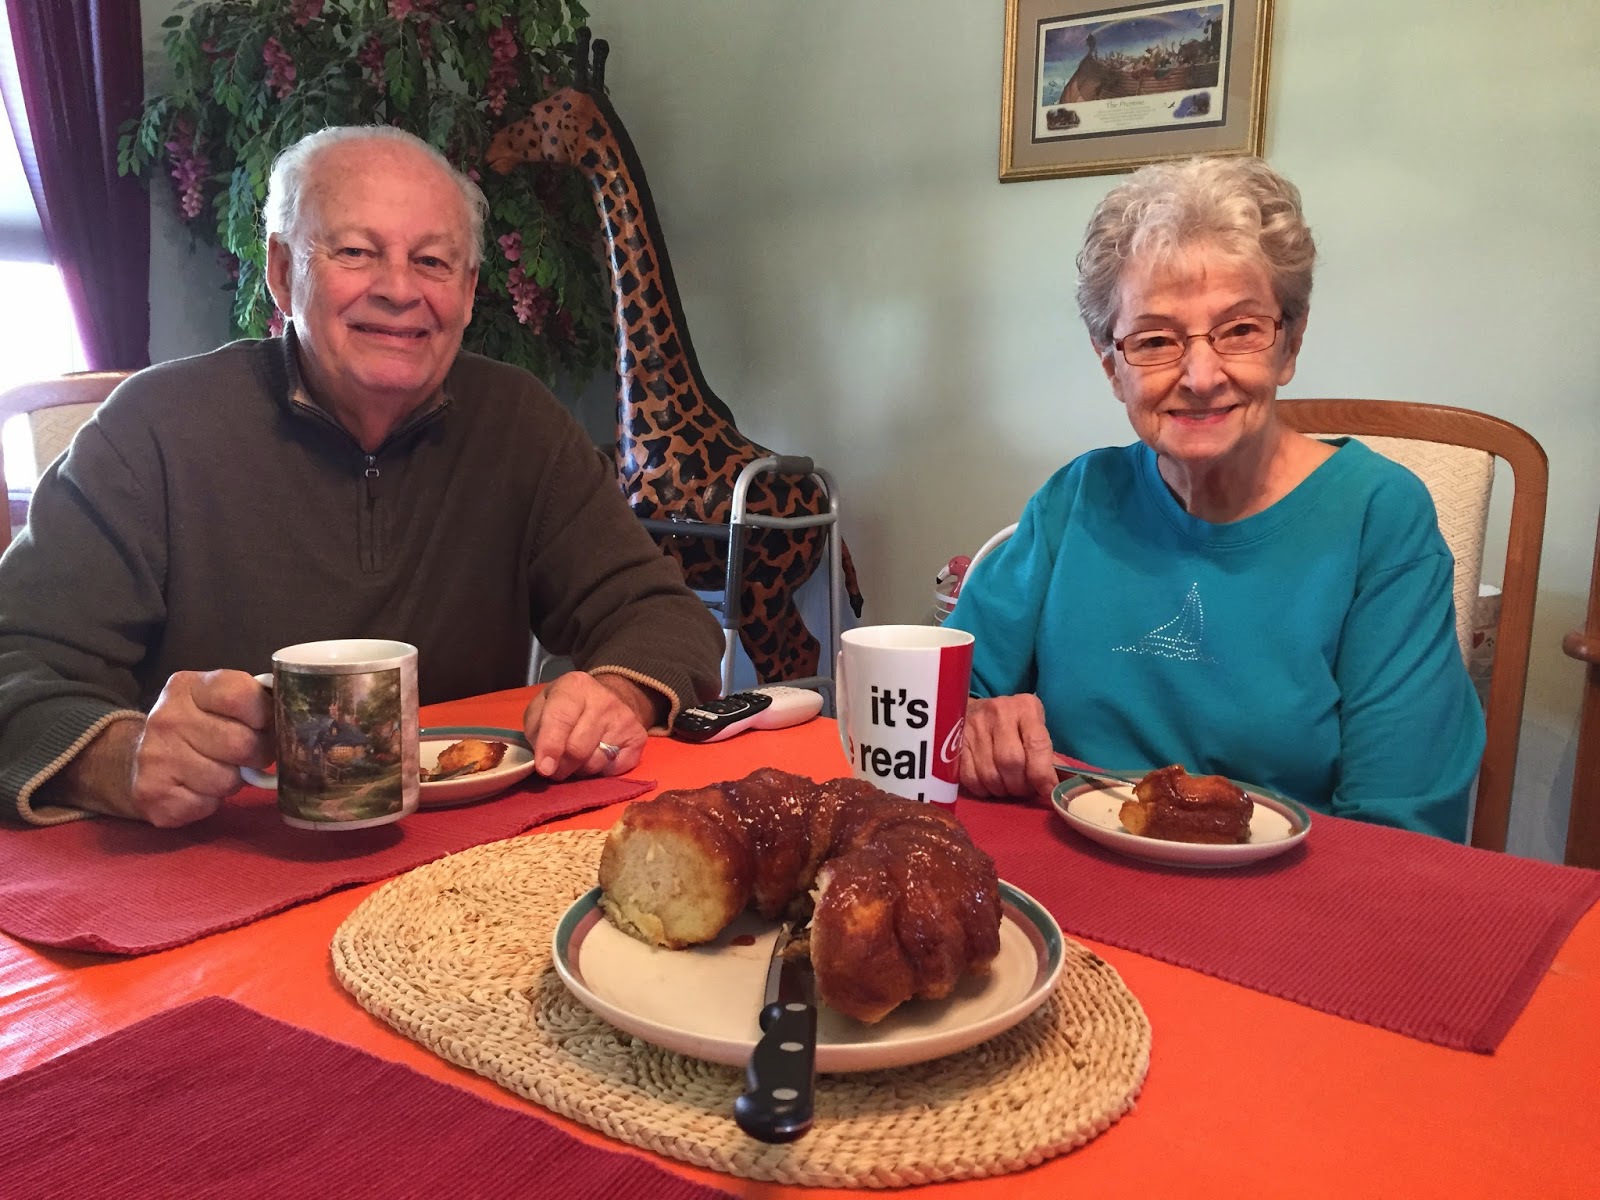
This is a recipe you will be sure to please the kids young and old with! I came across this recipe while on vacation and it reminded me of the monkey bread I have made in the past but less time consuming. This post goes out to Brenda. Thanks for being the best twin sister ever and thanks for vacationing with me to the land of our parents!
Biscuit Cinnamon Roll
2 small tubes refrigerator buttermilk biscuits
3 Tbsp butter, melted
1/2 cup pancake syrup
1/3 cup packed brown sugar
1/2 tsp cinnamon
Spray a bundt pan with non-stick spray. Combine the melted butter and syrup in a small bowl and set aside. In another bowl, combine the brown sugar and cinnamon. Place about half of the syrup mixture in the bottom of the pan. Then sprinkle half of the brown sugar mixture on top. Lay the biscuits on the bottom of the pan, overlapping edges (closely together) to form a ring. So you are basically laying them side by side. Top with remaining syrup and sugar mixtures. Bake at 375 degrees for 20-25 minutes. Cool for 1 minute in the pan, then invert onto a serving platter.

The next time I make this I might make more of the syrup mixture and sugar mixture to add in between the biscuits as I put them into the pan.
These were delicious. Thanks to my Mom & Dad for demonstrating just how yummy they were.
Thanks for checking in on me.
Linda
Biscuit Cinnamon Roll
2 small tubes refrigerator buttermilk biscuits
3 Tbsp butter, melted
1/2 cup pancake syrup
1/3 cup packed brown sugar
1/2 tsp cinnamon
Spray a bundt pan with non-stick spray. Combine the melted butter and syrup in a small bowl and set aside. In another bowl, combine the brown sugar and cinnamon. Place about half of the syrup mixture in the bottom of the pan. Then sprinkle half of the brown sugar mixture on top. Lay the biscuits on the bottom of the pan, overlapping edges (closely together) to form a ring. So you are basically laying them side by side. Top with remaining syrup and sugar mixtures. Bake at 375 degrees for 20-25 minutes. Cool for 1 minute in the pan, then invert onto a serving platter.
The next time I make this I might make more of the syrup mixture and sugar mixture to add in between the biscuits as I put them into the pan.
These were delicious. Thanks to my Mom & Dad for demonstrating just how yummy they were.
Thanks for checking in on me.
Linda
Wednesday, April 22, 2015
Bed Skirt
I had a bed skirt I really hated, then I washed it and it shrunk. Ugh, now I hate it even more. So painters drop cloth to the rescue. This stuff is a great neutral color and it is tough as steel. So let's get started.
I like to buy the 6 x 9 drop cloth as it doesn't have seams.
I have a queen size bed. I don't have specific measurements so make this to fit whatever size bed you have. READ ALL INSTRUCTIONS BEFORE STARTING! There are options you can choose.
Get rid of the mattress and measure the dimensions of the box spring. Get two measurements, length and width, cut your base add an inch on three sides for the seam allowance. OR you could do what I did and lay the drop cloth on the box spring and with a marking pen mark where the edge (seam) to the skirt will be. I added an inch all the way around for seam allowance and cut. For the top of the bed where you will not have a skirt I used the drop cloth original hem. Why not use the factory edge, nice clean finish. And I won't have to hem that side.
Now, decide how long you want the skirt itself. Keeping this in mind and your length and width measurements. Cut two for the length and one for the width. Add enough on the bottom for a hem and enough on the top (1 inch) for the seam allowance. OR you can add pleats to your skirt like I did. Check out how I made pleats for the Slipcover. For the bed skirt I wanted a pleat half way down the length at the corners and in the middle of the end section. Using the measurements from the Slipcover project I cut appropriate lengths. Hem each section before pleating it. Makes the layout easier. Pin the skirt to the base and sew. Add each section as you go. Below you can see several views of the skirt on backwards.
AND Right side out and finished!!
I have a queen size bed. I don't have specific measurements so make this to fit whatever size bed you have. READ ALL INSTRUCTIONS BEFORE STARTING! There are options you can choose.
Get rid of the mattress and measure the dimensions of the box spring. Get two measurements, length and width, cut your base add an inch on three sides for the seam allowance. OR you could do what I did and lay the drop cloth on the box spring and with a marking pen mark where the edge (seam) to the skirt will be. I added an inch all the way around for seam allowance and cut. For the top of the bed where you will not have a skirt I used the drop cloth original hem. Why not use the factory edge, nice clean finish. And I won't have to hem that side.
Now, decide how long you want the skirt itself. Keeping this in mind and your length and width measurements. Cut two for the length and one for the width. Add enough on the bottom for a hem and enough on the top (1 inch) for the seam allowance. OR you can add pleats to your skirt like I did. Check out how I made pleats for the Slipcover. For the bed skirt I wanted a pleat half way down the length at the corners and in the middle of the end section. Using the measurements from the Slipcover project I cut appropriate lengths. Hem each section before pleating it. Makes the layout easier. Pin the skirt to the base and sew. Add each section as you go. Below you can see several views of the skirt on backwards.
Ellie wanted to get in the photo.
I kind of wish I had put an additional pleat at each corner but overall I'm really happy with it. I've washed it already and it still looks awesome. There are endless uses for these drop clothes. I hope to make dining room curtains next! Check back in to see.
Linda
Pan Fried Chicken and Mushrooms
New Recipe Wednesday!
Welcome back. I was chatting with a friend today and she asked if I had anything new on my blog. Once again I have been so deep in doing and creating and not enough time to blog about it. So Jackie, this post is for you!
I came across a recipe in a magazine while I was on my way to a sunny destination last month and thought I could tweek it a bit to make it mine. This is what I came up with.
Pan Fried Chicken and Mushrooms
4 chicken thigh-leg pieces with skin on
2 Tbsp snipped fresh thyme
1 Tbsp olive oil
8 oz button mushrooms, sliced
2 Tbsp honey dijon mustard
1 Tbsp snipped fresh flat leaf parsley
Heat olive oil over medium heat in a skillet. Add chicken. Season chicken with sea salt and ground pepper. Brown chicken, both sides. Now add the fresh thyme, parsley, mushrooms and drizzle with dijon mustard. Cover skillet with lid and continue to cook chicken turning as needed until cooked through. I served this with some fresh green beans. And the next time I make this I will remember to take a picture. This will serve 4 people. Enjoy!
Linda
Welcome back. I was chatting with a friend today and she asked if I had anything new on my blog. Once again I have been so deep in doing and creating and not enough time to blog about it. So Jackie, this post is for you!
I came across a recipe in a magazine while I was on my way to a sunny destination last month and thought I could tweek it a bit to make it mine. This is what I came up with.
Pan Fried Chicken and Mushrooms
4 chicken thigh-leg pieces with skin on
2 Tbsp snipped fresh thyme
1 Tbsp olive oil
8 oz button mushrooms, sliced
2 Tbsp honey dijon mustard
1 Tbsp snipped fresh flat leaf parsley
Heat olive oil over medium heat in a skillet. Add chicken. Season chicken with sea salt and ground pepper. Brown chicken, both sides. Now add the fresh thyme, parsley, mushrooms and drizzle with dijon mustard. Cover skillet with lid and continue to cook chicken turning as needed until cooked through. I served this with some fresh green beans. And the next time I make this I will remember to take a picture. This will serve 4 people. Enjoy!
Linda
Tuesday, February 17, 2015
Sausage & Kale Pasta
New Recipe Wednesday
It's been awhile for a new recipe. Maybe I was waiting for just the right one? I think that would be accurate. It's winter in February all we really want is some comfort food. I have just the thing. Thanks Alyssa for making this for the family. It really hit the spot. And the added bonus of healthy items in it was super. We loved it. I hope you will too.
Sausage & Kale Pasta
serves 4-6
It's been awhile for a new recipe. Maybe I was waiting for just the right one? I think that would be accurate. It's winter in February all we really want is some comfort food. I have just the thing. Thanks Alyssa for making this for the family. It really hit the spot. And the added bonus of healthy items in it was super. We loved it. I hope you will too.
Sausage & Kale Pasta
serves 4-6
Ingredients:
- ½ box whole wheat or whole grain penne pasta
- 2 links lean turkey or chicken sausage
- 1½ cups baby portobella mushrooms
- ½ cup sun-dried tomatoes (tip: buy the ones that come in the zipper bag, not the kind in a jar soaking in oil...I found these in the produce section)
- 1½ cups kale
- 1½ cups spinach leaves
- ½ cup shredded parmesan
- ½ cup shredded mozzarella cheese
- 1 tbsp whole wheat flour
- ⅓ cup skim milk
Directions
- Cook pasta according to package instructions (Important: right before draining the noodles, save a ladel-full of hot, starchy cooking water-you will need that later for the sauce!)
- In a skillet, saute all vegetables. Season with pepper, garlic and onion powder, and Italian seasoning. Once tender, remove from pan, and cover with foil to keep warm.
- Remove the sausage from its casings and brown the meat in the skillet. Once cooked, remove from pan and drain any excess grease from the meat
- In the same skillet, add the flour to the pan drippings and whisk to form a roux. Note: you may need to add a teaspoon or so of EVOO depending on how much pan drippings you have
- Gradually stir in milk and followed by the reserved starchy cooking water
- Reduce heat, stirring slowly, and allow sauce to thicken.
- Stir in shredded cheese using a figure-8 motion until the cheese dissolves into the sauce
- Adjust sauce seasonings to taste, adding in garlic and onion powder and pepper to taste. Also, if the sauce gets too thick and pasty, add more milk or cooking water- you want this to have an nice creamy consistency
- Add the noodles, sausage, and vegetables to the sauce and stir to coat evenly.
Note: If you’re not a fan of sausage, try this with diced chicken breast or even lean ground turkey (seasoned with garlic and onion powder, Italian seasoning, and a little red pepper flake)
My son's girlfriend made this dish for us last weekend. I'm not even sure what EVOO is. But I will find out. Also, she did remove the sausage from the casings (or she had my son do it, it's good for him) but honestly I would have left the casings on, cut up the sausage and browned them as is. The spices aren't specific but I would be generous. I love garlic and onion so add them right to it. I would even goes as far to say that I'd cut up a half of an onion and brown it with the sausage and while you're at it throw in some minced garlic instead of using the powdered.
HA! I just looked up EVOO boy do I feel silly. Stands for Extra Virgin Olive Oil.
This recipe came from a fellow blogger. You can find it here. All credit goes to Melissa at Honeybee Homemaker. I did add most of the notes.
Good eats! Thanks for checking in on me.
Linda
Monday, February 16, 2015
Office Chair Recover
One of these days when you check on me that ugly floor will be gone but for now let's concentrate on what is sitting on the floor. This chair is your basic student Office Depot desk chair purchase. I keep it in my kitchen because it's small. Fits under our little kitchen desk (also someday it will be gone) and it wheels to the kitchen table for that unexpected 5th person at dinner. This chair used to look like this.
Super ugly and plain, right? This is a quick and easy fix. I had leftover painters drop cloth from my Slipcovered Chair project. So I went to work.
This is what you'll need:
scissors
fabric of some kind
staple gun and staples
screwdriver or allen wrench
First flip that chair upside down. A little ingenuity and you'll figure out how to get the seat and back off.
Now pry the cushions off using the tools of your choice.
Some models will allow you to remove the old yucky black fabric. Mine did not so I decided my canvas painters cloth was thick enough that you'd never be able to tell. I laid out the fabric over the pieces to be covered and cut. Giving each piece enough fabric to be wrapped around to the other side. Better to go too big than too small and waste your fabric. Start wrapping your fabric on your piece and tack it down using your staple gun.
The under side of the seat looks like this.
The back side of the chair like this...
I had to tack the back of the seat in a few spots to attach it securely to the cushion. But if you have to and use a patterned fabric you wouldn't be able to notice it at all.
This was an easy recover and I had all the materials so it was free. Just what I like. Small update to our kitchen. Now to do something about that floor and those cabinets.
Thanks for checking in on me. I know a few of you are waiting patiently for my freezer meals for 2. Soon, I promise it very soon. So keep checking back.
Linda
Subscribe to:
Posts (Atom)