Showing posts with label Redecorating. Show all posts

Sunday, October 18, 2015

ElliesAlley

I've started a new adventure. My Grandma Morris taught me and my sister to sew when we were 8. We made matching tops and scarves for our 4-H project. Got a blue ribbon by the way. Growing up my Grandma Mellinger would wear an apron everyday over her dress. Both Grandmothers loved to garden, freezing or canning what they grew. And, I consider both of them to be very crafty and creative. Which leads me to my new adventure. I've taken my love of sewing and memories of days gone by and created ElliesAlley. 


In my shop https://www.etsy.com/shop/ElliesAlley  you'll find Aprons and Home Decor. I also have a Facebook page www.facebook.com/ElliesAlley .
Please swing by both sites for the latest apron I've sewn or a new recipe and much more. You may not see new posts on the Lindaloo blog but don't worry. Follow me on Facebook, like my page and feel free to comment. The more you do the more you will see my posts in your feed. Or you can always search for ElliesAlley on Facebook. I'm hoping to reach new and old friends so feel free to share my Facebook posts!


Thanks for checking in on me. 

Linda

Etsy.com/shop/ElliesAlley
www.facebook.com/ElliesAlley


Monday, February 16, 2015

Office Chair Recover


One of these days when you check on me that ugly floor will be gone but for now let's concentrate on what is sitting on the floor. This chair is your basic student Office Depot desk chair purchase. I keep it in my kitchen because it's small. Fits under our little kitchen desk (also someday it will be gone) and it wheels to the kitchen table for that unexpected 5th person at dinner. This chair used to look like this.


Super ugly and plain, right? This is a quick and easy fix. I had leftover painters drop cloth from my Slipcovered Chair project. So I went to work.

This is what you'll need:
scissors
fabric of some kind
staple gun and staples
screwdriver or allen wrench

First flip that chair upside down. A little ingenuity and you'll figure out how to get the seat and back off. 


Now pry the cushions off using the tools of your choice.


Some models will allow you to remove the old yucky black fabric. Mine did not so I decided my canvas painters cloth was thick enough that you'd never be able to tell. I laid out the fabric over the pieces to be covered and cut. Giving each piece enough fabric to be wrapped around to the other side. Better to go too big than too small and waste your fabric. Start wrapping your fabric on your piece and tack it down using your staple gun. 


 The under side of the seat looks like this. 


The back side of the chair like this...


I had to tack the back of the seat in a few spots to attach it securely to the cushion. But if you have to and use a patterned fabric you wouldn't be able to notice it at all.


This was an easy recover and I had all the materials so it was free. Just what I like. Small update to our kitchen. Now to do something about that floor and those cabinets. 

Thanks for checking in on me. I know a few of you are waiting patiently for my freezer meals for 2. Soon, I promise it very soon. So keep checking back.

Linda


Sunday, November 16, 2014

My Boys


I have been on a journey this year to add to my bare walls. My boys are older now and moved or near move out age, but I will always be their Mom and always be so proud of them. They will always be my babies. I took several pictures of them together through the years and had them matted and framed. Add in a couple of the pieces of art they created in elementary school and a P. Buckley Moss entitled "Brothers Together" and there you have it. I see this every morning when I wake up.

No matter how old they get I'll love them forever!!

Thanks for checking in on me!!
Linda

Friday, January 31, 2014

Floors so easy, you can install them too.

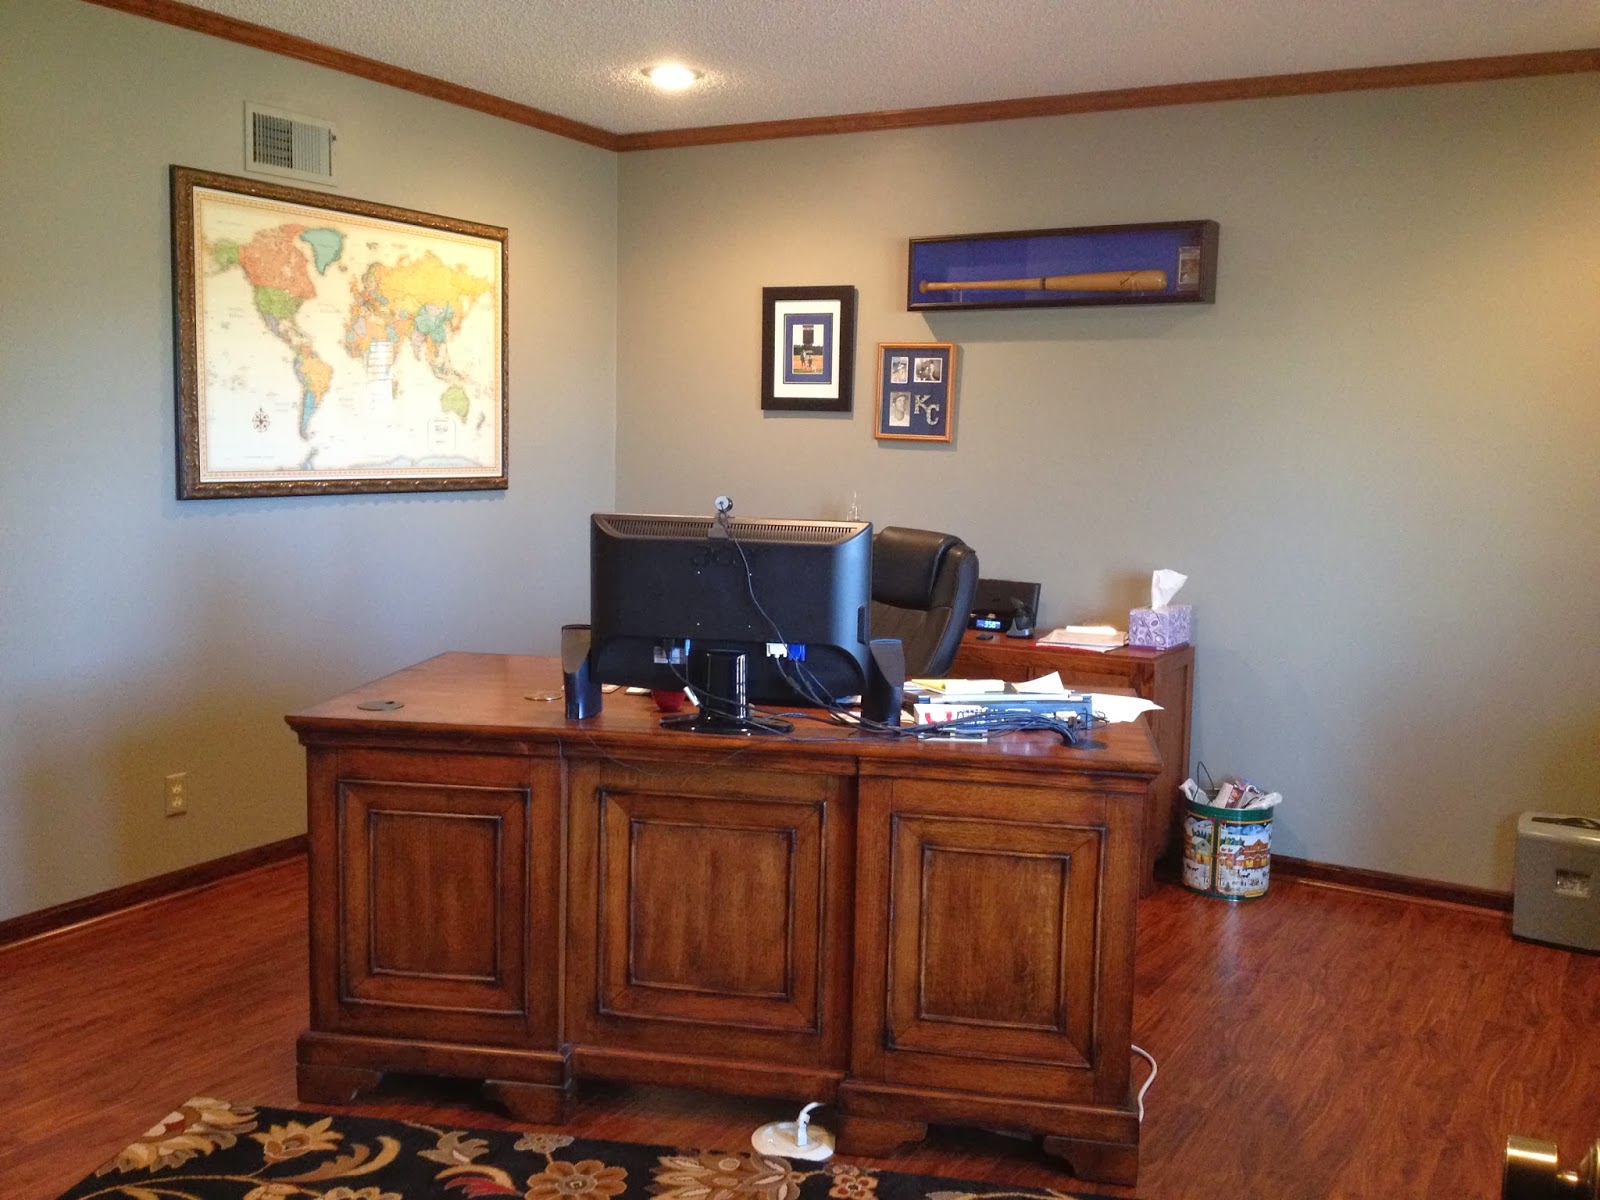
With two rooms under our belt it was time to give my husbands office an upgrade with new flooring. And why not he is lucky enough to work out of his home he deserves the best. Here is a before picture. I'd already started removing furniture and things off the walls.


I really wanted this carpet out of there. So I got right to work.


Taking a utility knife and cutting the carpet and pad into manageable sizes is the first step. Plus this will help with disposal. Some cities allow curbside pick up for a small fee. My method is to fill up the SUV and have hubby take it to the dump. It too is a small fee. But what man doesn't like to take a trip to the dump. Hmmm, must be a man thing.


Next step, cleaning up all the staples and nails so I have a clean surface.


I couldn't resist. while the room was empty and I was about to pull the base boards I thought this would be a great time to choose a new wall color. I choose the color on the right. "Tornado Watch", it's a Valspar color I got at Lowe's. I didn't want to go too dark. This room faces north so doesn't get alot of light. Paint while nothing is in the room and baseboards are removed. It makes it so much easier.


Bring your flooring in to get it acclimated to the temps in the house. And now you can see where all the stuff from the office went to. Who knew his closet could hold so much? My flooring is Golden Teak. Engineered, handscraped, floating floor. I got it at Lumber Liquidators. The store in my area has people that are very helpful to someone like me that is a DIYer.


I set up my work station right outside the front door. Handy, yet keeps alot of the dust outside. You'll need measuring tape, speed square, jigsaw, clamps, marking pencil and a miter saw.


So get started. There are some really good video's on the Lumber Liquidator site to show how to lay a floating floor and You Tube is filled with them. Another go to is the DIY channel. Measure, cut, make sure seams don't land closer than 12 inches from each other. Always buy plenty as you'll have more waste than you think. I used a Dremel tool to cut the bottom of the door jams. To get the right height place a piece of your flooring down and saw above it for a perfect fit for the new flooring to slide under it.


I took the flooring into the hall and that means including another closet. Don't be afraid to work in small spaces.


You'll be pleased with the results.


Next it was time to get to work on the trim. You already know I'm frugal. I removed the existing trim, sanded it down and chose a matching stain. Adding three coats of polyurethane. I purchased quarter round, stain and polyurethane went on that too. Cut to fit and install. I used a finish nailer. Be sure to miter your corners for a professional look.

And now what you've been waiting for the finished product. I had to wait to for this step as I hired electricians to come install can lighting in the room. It gave excellent light and really updated the look of the room. The old single "boob" light in the center of the room just wasn't cutting it. 


I love how the room turned out. I found this rug at Lowe's. It really brought all the elements in the room together.


One can light in the center of the room and one in each corner was enough for just the perfect lighting. We had it hooked up to existing switch and they put a dimmer on it as well. Bonus! Remember when adding cans, take the height of your ceiling and that is the diameter one can will illuminate onto the floor. Ours were 8ft ceilings, each can lighted up 8ft on the floor. This room is only 13X16 so more lights would have been too much.


Rearranging hubby's memoribilia on the walls, adding this thrift store chair find and repainting an end table someone left out for the trash...New Office finished.
He is super happy with the result and so am I. Thanks for checking in on me. Leave me a note to let me know what you think. I do truly love hearing from you.
Linda

Saturday, October 12, 2013

Pillow Trio Part 2


My last blog was how I transferred these images onto fabric. If you want to know how to sew the pillows hang around. This is what I did.
 
 
You'll need:
- sewing machine
- thread
- pins
- scissors
- fabric (I used leftovers from curtains, curtains, curtains )
- piping (cording)
- pillow forms
- button (optional)
 
For the 2 pillows I transferred images to, I cut the image fabric and the backing fabric to the size I preferred. The bigger one is 14x14 so I cut the fabric 15x15 and planned to use a 1/2 inch seam. The smaller one I didn't use a pillow form. I had some old polyester stuffing I planned to use so I cut this fabric in a size I felt matched to image also keeping in mind I needed 1/2 inch seam allowance.
 
 
Next cut a 2 inch strip of fabric to go completely around you pillow plus a couple of inches. Also cut piping the same length. Piping is really easy to make. Lay the cording in the center of the 2" strip and fold over with wrong sides together. Using a zipper foot on your sewing machine sew as close to the cording without running over it.
 
 
Sew the piping onto the fabric making sure your sewing line is 1/2 inch from the edge. When you come to the end of the piping, clip cording to meet the starting point leaving fabric longer. Fold under fabric enough to cover the starting point and continue to sew.

 
Place transfer fabric and fabric with piping right sides together.

 
Still using the zipper foot sew on the same line around the pillow leaving an opening to be able to turn it right side out.
 
Stuff with your pillow form and hand sew the opening closed.
 
If you would rather make a pillow that can be removed to wash you'll want to adjust a little. For the back still cut a piece that is 15x15. Set aside.
Now you'll need to cut two pieces that are 15x10.


Fold the end of each 15x10 piece under 1 1/2 inches and hem. Lay these two pieces so they slightly overlap. They will need to now measure 15x15 as a whole. Baste together at sides.
 
 
Grab the other 15x15 piece that you sewed the piping to. With right sides together sew front to back. Turn right side out by the over lapped area.
 
I found this cute button and sewed it to the outer section. It gives it the look of a real working button but it's only purpose is decoration.
 
 
This is the finishing touch to this one little corner. I hope you make something
today that makes you smile.
 
Linda
 

Friday, October 11, 2013

Pillow Trio


I've been wanting to try my hand at transferring images to fabric and adding to this one little corner . You've heard me talk about the great images that are free from www.thegraphicsfairy.com so I printed a few of them off and here's what I did...
I chose to transfer using the Citrasolv method. What you'll need:
- Citrasolv- this is a cleaning solvent
 - A copy of your image that has been printed old school. Find a copier that uses toner. The copy stores won't be of any help, they've skipped old school long ago. I found an old copier at a local grocery store.  
- Newspaper
- Tablespoon
- Tape
- Fabric
- paint brush or foam brush

A friend (Jodie at http://www.thenesteclectic.blogspot.com/) and I went in together and split the bottle of Citrasov as a little goes a long way. That's why mine is in an old pickle jar. :) Lay your newspapers down. Use several for thickness. I used some leftover canvas from the slipcover project as my fabric. Tape your copied image face down centered appropriately over the fabric. "Paint" the citrasolv over the page. Remember a little goes a long way. Grab that tablespoon and burnish the image well. Two minutes maybe. If you lift a corner to see how it's doing be careful. If the image  moves you're not likely to get it in the same exact spot. Take away the copied image, remove tape and let the fabric dry. This is a permanent image, however I found that if you machine wash it to remove the citrasolv the image will fade.


Here's my little bumble bee. I'll be making him into a 14x14 pillow.


And here's the bee's apartment complex. This is the first image I transferred and realized I use a little too much citrasolv. The image blurred a little. I made this into a small pillow.


This creation was given to the bride to be after the shower I had given her. The future Mrs. B really liked it. And it helped that with a little digging I found out what color the decor' in their new abode was going to be and bought fabric to back it to match. I saw this idea on Pinterest and then made my own design using Microsoft Word. When you print it out be sure to print the mirror image. Print-Properties-Mirror image on.

I made pillows but you may choose to make tea towels, napkins, frame it to hang on the wall, the list goes on. Let me know what you transfer.

Linda

Thursday, October 10, 2013

Initial Love

 
Ok, I might be a craftaholic. Or maybe I just have a Pinterest problem. But I feel if you find things on Pinterest why pin them if you're not going to try to make it. So I gave this a shot.
I saw this here.
Karen at Somewhat Quirky didn't like her end result but I couldn't wait to make one. This is what you'll need: Paper Mache letter, Alene's Tacky Glue, Aluminum Foil, Mod Podge or a Glue Stick, Gel Stain or Shoe Polish with Applicator Tip.
 
 
I wanted to have a plan in mind before dripping glue all over the place, so I took a pencil and drew out a design on my initial. (I'm making this B for a shower I'm giving to be part of the decorations and give to the future Mrs. B)
 
 
Remember to make your glue design thick. As the glue dries it will shrink. I went back over areas that ended up too thin with an extra bit of glue. Let the glue dry completely.


I chose to use Mod Podge because it is what I had on hand. A craft paint brush, some scissors and maybe some Q-tips will help with the next part. Cut strips of foil slightly wider than the sides of the letter. I then painted the mod podge on the wrong side of the foil strips and apply them to the sides of the letter. Smooth it on and wrap excess onto front and back of letter.
 
Now lay your letter on a sheet of foil and trace the shape. Cut the foil so it is relatively close to the exact size of your letter. Paint with your adhesive and apply it to the letter. Working quickly, use the Q-tips to gently press the foil around the glue design. Work from the center out to the edge. Foil will tear if stressed too much.
 
Once you have the front done, use the same method to cover the back. Try not to get glue on the "right" side of the foil as the staining medium may not adhere as well.
 
 
This looks pretty good like this but I couldn't resist and wanted to try the shoe
polish with the applicator tip.
 
 
I felt the shoe polish didn't come out well and would use gel stain if I do this again. Whatever medium you use, spread it around and take a clean dry cloth to wipe off any excess.
Let this dry completely.


Here are a couple of other blogs to see how they did theirs.
If you give this a try let me know. I'd love to here how yours turned out.
 
Linda


Related Posts Plugin for WordPress, Blogger...