
Wednesday, October 24, 2012
Thought for the Day!
May you find the strength to face tomorrow in the love that surrounds you today!
Tuesday, October 16, 2012
My Tuesday Rant
I love it when a friend tells me they checked on my blog and left a comment. I rush home, log in to see what they said. Then I find nothing there. I know it is not the friends fault. What is it that Google blogger makes it so hard for people to leave comments. It really needs to be changed. I guess my love is more for the things I create than the computer I type it on. HAHA!
I love to hear from you and am sorry this site is not very user friendly at times. Don't give up on me. Continue to leave comments and maybe some day we will figure it all out. Have a great day!
Linda
I love to hear from you and am sorry this site is not very user friendly at times. Don't give up on me. Continue to leave comments and maybe some day we will figure it all out. Have a great day!
Linda
Wednesday, October 10, 2012
Chicken Enchiladas
By special request: Chicken Enchiladas
 serves 6-8
2 cans mild enchilada sauce, divided
2 cups chopped, cooked chicken
1/2 cup sour cream
1 dried jalapeno pepper chopped
1/4 tsp salt
2 cups shredded Monterey Jack cheese, divided
10 flour tortillas
Preheat oven to 350 degrees. Pour 1 can of enchilada sauce in a 9X13 baking dish. In a large bowl combine chicken, sour cream, jalapeno and salt. Stir in 1 cup cheese. Spoon about 1/3 cup chicken mixture down center of each tortilla. Roll up tortillas and place, seam side down in prepared baking dish. Pour remaining 1 can enchilada sauce over top, sprinkle with remaining 1 cup cheese. Bake, uncovered for 30 minutes or until cheese is melted. Enjoy!
Tuesday, October 9, 2012
Fancy Braided Scarf

You can use a large square scarf or a long rectangular one like mine. Step 1: Put it around your neck with ends even.

Step 2: Start by tying it like you would to tie your shoe. Bring it up to the point where you want the finished scarf to hang. Notice I have the "under" end on my right side.

Step 3: Bring the right over the left.

Step 4: Grab that now left side and draw it up under and over the top.


Step 5: You can pull this as tight or loose as you like.

Repeat Step 3-5 till you get to the end.

Now tie it off. And that's it! Your Fancy Braided Scarf is done.

And see how much patience my furry friends had while I blogged about it. Thanks for checking in on me. Leave me a comment and let me know what you think. Have a great day! Linda

Thursday, September 27, 2012
One Little Corner

 Now, I can't even believe I didn't take photos of the next several things that happened, but I didn't. There was some drywall repair that had to be done and since I was doing it I decided to remodel the half bath that you see in the picture above. I took off one of those big wall mirrors that had been adhered right to the wall and so...more drywall repair.
  I painted the vanity black, bought a granite counter top and sink off Craig's List, bought tile off the clearance rack at Lowe's for the backsplash, dug out the faucet I had bought and stored away, picked up the mirror at Home Goods, painted the walls a new color & it was all tied into the old valance. But I'm getting side tracked.
 Being the thrifty person I am I found some 2 x 4's and began to construct a box in my new little corner of the world. This will be a bench for sitting and storage. I sided the bench with some of the tongue in groove paneling I had removed from the family room when we remodeled that.
 I purchased a piece of pine and called on a good friend that has a table saw. (A table saw is at the top of my wish list for Christmas.) After he helped me cut the wood to my specifics I was back home in my basement. I painted the lid black with the same paint I used on the vanity. As you can see I used a satin finish in Kettle Black.
  To help it flow better when painting furniture I used Floetrol. It is a product I bought at Lowe's that you mix with the paint. It works wonderfully. As you can see I also used a sponge roller. If I had this to do again I would put a coat of polyuerathane over the black paint. The seat will take alot of abuse & the extra protection would help. I could add it now and may, if time allows.
 I screwed the long strip to the bench at the back and the short strip to the bench on the side. Attach a piano hinge and covered the screw heads with wood putty and touched up the paint. It turned out great! Now comes that weekend I spent with my sister. We started our antique door knob coat rack! We're frugal sisters so we used lumber we had hanging around and this is what we did......
 This is crown molding I purchased and you guessed it, I painted it black with the same paint with the Floetrol in it.
 You'll notice I wrap my brushes & rollers in plastic wrap and put in the refrigerator. I do this in between coats of paint. It saves me time to have to clean a roller or brush between each coat.
 And I want to share one of my favorite things. This Mineral Spirits for cleaning up brushes. I was so tired of throwing out brushes because I couldn't get stain or paint out of them. This stuff cleans them up so well they are soft and smooth ready for the next project. And it's eco friendly!
 Ok, so now the trip to see my sister, Brenda. This is us, having coffee before we begin our project. This is a great coffee shop, archetechural salvage place. I came home with salvage that I will turn around and earn a little money from but that will be another blog at a later date.
 These are her pieces of wood she found around her place for her coat racks. She's making 2 of them. They will be a little shorter than mine and only have 3 door knobs on each. Mine will use 5 door knobs. We drilled through the back side of the base wood where each door knob will be placed.
 Screws up through the back ready for door knobs. Place construction adhesive into the knob and place over screw.
I love this knob. The raised detail is beautiful.

 Now we're ready for the crown molding. Study up on how to cut mitered corners before you tackle this. It's not for the weak. I enlisted my husband to help with this part.
  But first back to my sister to check out her progress. Here she is being helped by her son, Thomas. They have taken scraps of molding from their basement remodel and are adding character and interest to the top of her coat racks. She plans to paint the entire piece. And there they are... ready to be painted and touched up and hung on the wall!


 Here is my finished coat rack. And to the right with the storage bench! And of course here is my favorite twin sister with her finished coat rack.
  Projects always go better, are much more fun and add loving memories to our days when spent with family or friends. Thanks for checking in on me. I'll be busy dreaming of my next project so I hope you leave me some notes in the mean time to let me know what you think! Linda
Sunday, September 23, 2012
Team Apparel T-Shirt Refashion


Now cut the neckline to your liking. I cut half, fold it over to cut the other half so the neckline is even.


 Grab those sleeves you set aside. Cut off the seam so it is not bulky when you reattach it to the garment at the sleeve. Trim down the circumference of the sleeve to fit. I wanted elastic around the sleeves so next I cut elastic and stretched it as I sewed it on. This automatically draws it together like you've gathered and then sewed but my way is easier and saves time. Sew sleeve with right sides together, pin sleeve into arm hole and sew it on. You may want to remove more fabric so the seam sits at the edge of your shoulder. I left the original hem on the sleeves...a big time saver.


Monday, September 10, 2012
Tip for Zucchini Cake all year around.
Wow, I have been busy and it hasn't been blogging. I'm pretty sad about that but I am happy to be working a temp job. Anyone can work a job for a short period of time right? Plus this job has been a blessing. I have met new people and learned new skills. The people are great and it is such a pleasant atmosphere to work in.
I do hope to blog soon about that project I worked on the weekend of my birthday. In the mean time a tip for the Zucchini Cake. I had a huge zuchinni and wasn't able to use all of it in the cake AND didn't want it to go to waste. So I shredded it in 2 cup portions and put it in freezer baggies for use later. I made another cake just last week and took it to the office. The girls said it was delicious!
Have a super week and thanks for checking in on me.
Linda
Sunday, August 12, 2012
Ruffle Cardigan T-Shirt Refashion

Linda
Summer almost Over?
Wow, it is August already. The summer is coming to an end fast. The heat is still on and fall allergies have started already. But I'm not letting that slow me down. Get out there and enjoy life. I'm excited to think of the fun months ahead. A weekend trip to visit family will produce my next blog. My twin sister and I will be constructing antique door knob coat racks!

I hope to share how our girls train ride to Hermann, MO went. And cooking smores over a fire will be even better when sitting next to the pergola we are planning to construct in our back yard.
I'd like to thank Beth at http://chicenvelopements.wordpress.com/ , Amber at http://rufflesandrosescrafts.blogspot.com/ and Tamara at http://etcetorize.blogspot.com/ for all the inspirational ideas for refashioning clothing. So when the weather turns cold I'll be sewing even more!
Hope you will check in on me. It's going to be a fun fall so come along for the ride! Linda
Sunday, July 22, 2012
Salsa by Lindaloo

What you"ll need: Ingredients (this recipe makes 9 pints)

- 24 medium beef steak or 48 roma tomatoes or a mixture of both
- 2 cups chopped jalapeno's
- 2 cups chopped green bell peppers (2-3)
- 2 cups chopped onion (2-3)
- 14 cloves garlic minced or I use minced garlic from the jar.
- 1 tsp crushed oregano fresh
- 2 tbsp salt
- 1/2 tsp pepper
- 2 tbsp sugar
- 1 cup white vinegar
- 6 oz can tomato paste

 What you'll need: Supplies
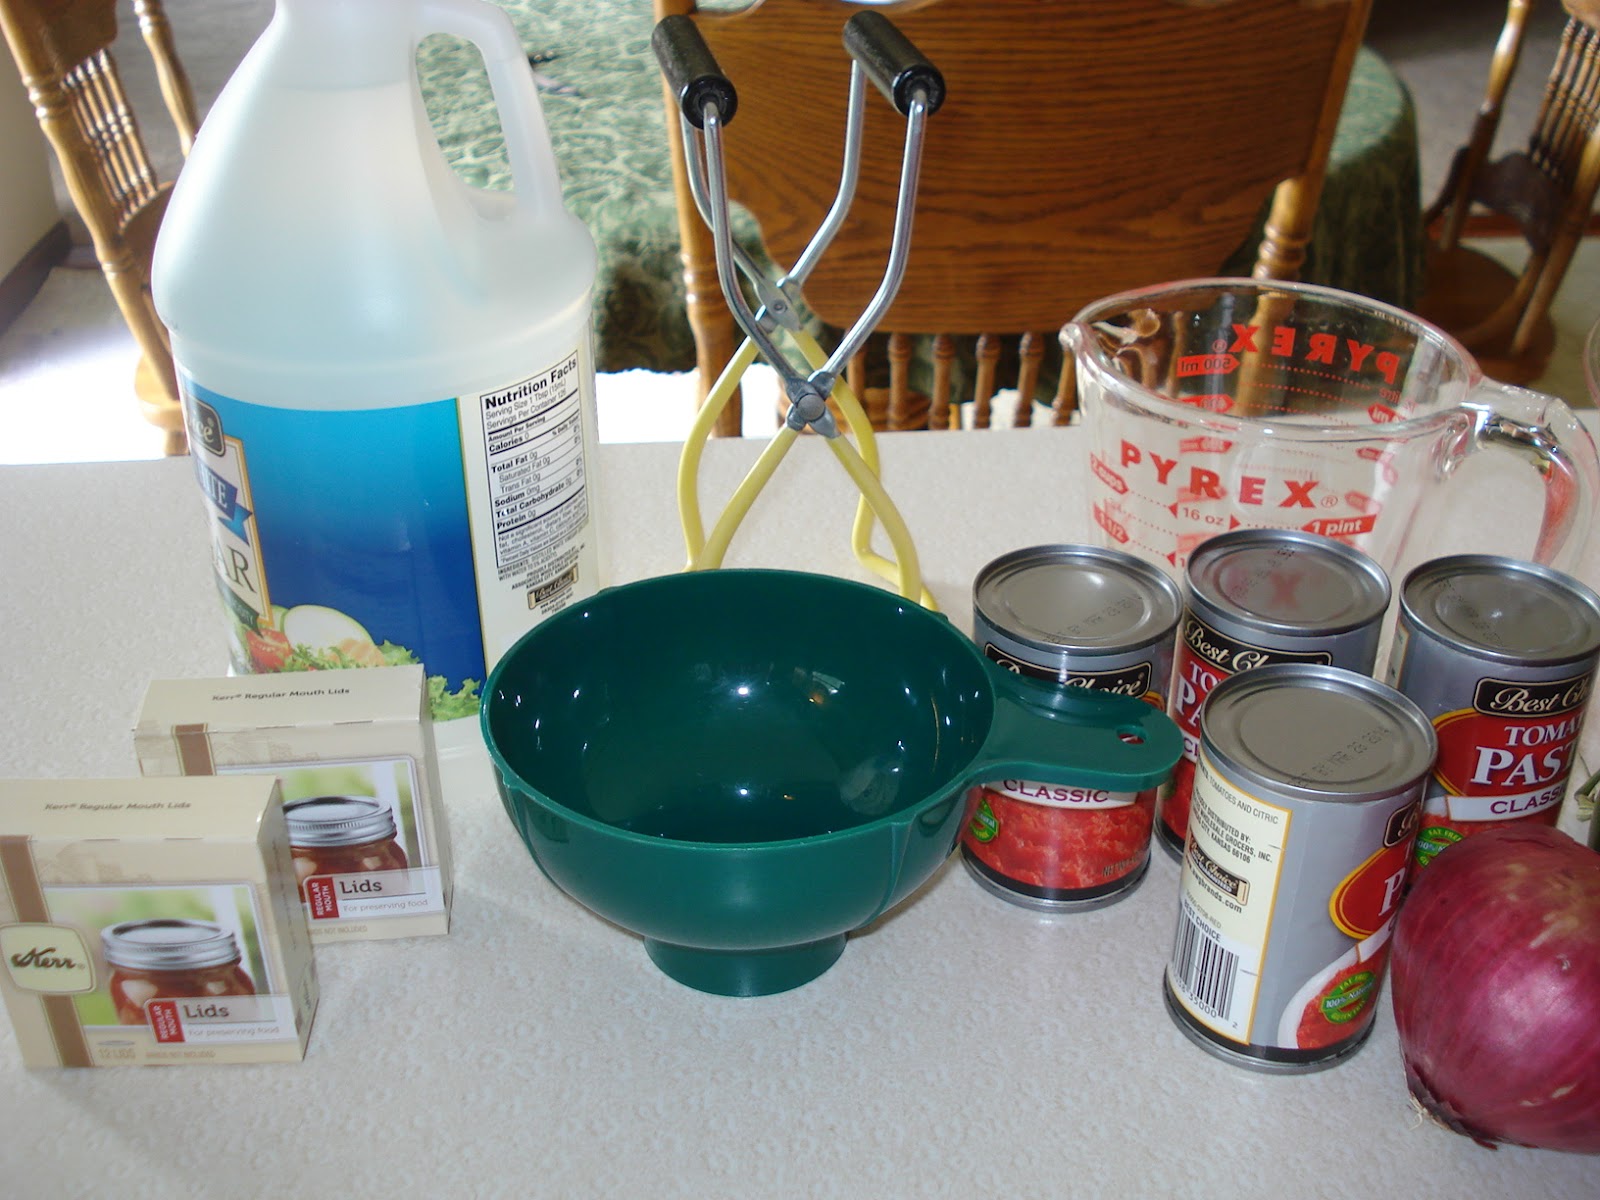
- water bath canner
- large kettle/stock pot
- pint jars, lids & rings to fit. I use regular mouth jars.
- jar tongs
- measuring utensils
- knives for dicing, vegetable chopper
- cutting board with cookie sheet under it catches juices
- spoons
- cooling rack
- paper towels
- jar funnel
 Blanch the tomatoes.
 Dip them into boiling water in a large kettle for 30 seconds. Remove from boiling water and immediately dip tomatoes into cold water. I fill my sink with water and add ice cubes.
 On the roma tomatoes I cut the stem end off and pinch off the skin. The tomato should slide right out. For other tomatoes cut out the core and peel. I blanch a pot full then ice them and then peel. Continue doing this till all tomatoes are peeled.
Now is a good time to fill canning kettle 3/4 full of water and start to bring it to a boil. It will be important to keep water boiling once jars are in the canner. With at least an inch of water over the top of the lids.
Chop your tomatoes. I like chunky salsa so I don't cut them too small.

Core other veggies, chop getting rid of seeds. Again, I like chunky salsa. You can place them in a blender or food processer for a smoother mixure. Place canning jars and rings in dishwasher and wash. I find the chopping more enjoyable if shared with my furry friends.

Add all ingredients to the large kettle. Simmer for 30 minutes, stirring occassionally. By now the dishwasher should be done. It's time to pack hot salsa into hot jars. Don't burn your fingers. Leave a 1/2 inch head space. That is the area from the top of the jar to the salsa.


Wipe the rim of the jar with a paper towel. Be sure the rim and outside of jar are clean. Rinse and completely dry lids. Make sure rings are dry as well. Place them on the jar. And place jar into canner using your tongs. My canner holds 7 jars. Place lid on canner. Bring to a rolling boil and time for 20 minutes.Make sure water is at least 1 inch over the top of the jars. Take jars out of canner and place on cooling rack. Do not set them where there is a breeze and do not handle for 24 hours. Check to make sure your jars have sealed after the 24 hours by pressing on the lids. If there is give your jar has not sealed. Not to worry. The salsa is still good. You just need to eat it right away. Share it with your friends and family. Be sure to label your salsa with the date. I use a Sharpie marker right on the lid.

And that's it. As you know my veggie garden is recipe specific. I don't always get the bell pepper I need and have to run to the store and the salsa tastes just as good. If you like your salsa with a little more kick add the seeds from the jalapeno's. And watch the tears flow. Happy Canning! Linda
Subscribe to:
Posts (Atom)