Sunday, July 22, 2012

Salsa by Lindaloo

I keep this recipe pretty close to me but so many have been asking for this for so long. If you aren't into canning, don't have the tomatoes or don't want to go to the trouble. I will always have a jar for you in the pantry. Remember to bring back the empty jar for a refill!

What you"ll need: Ingredients (this recipe makes 9 pints)
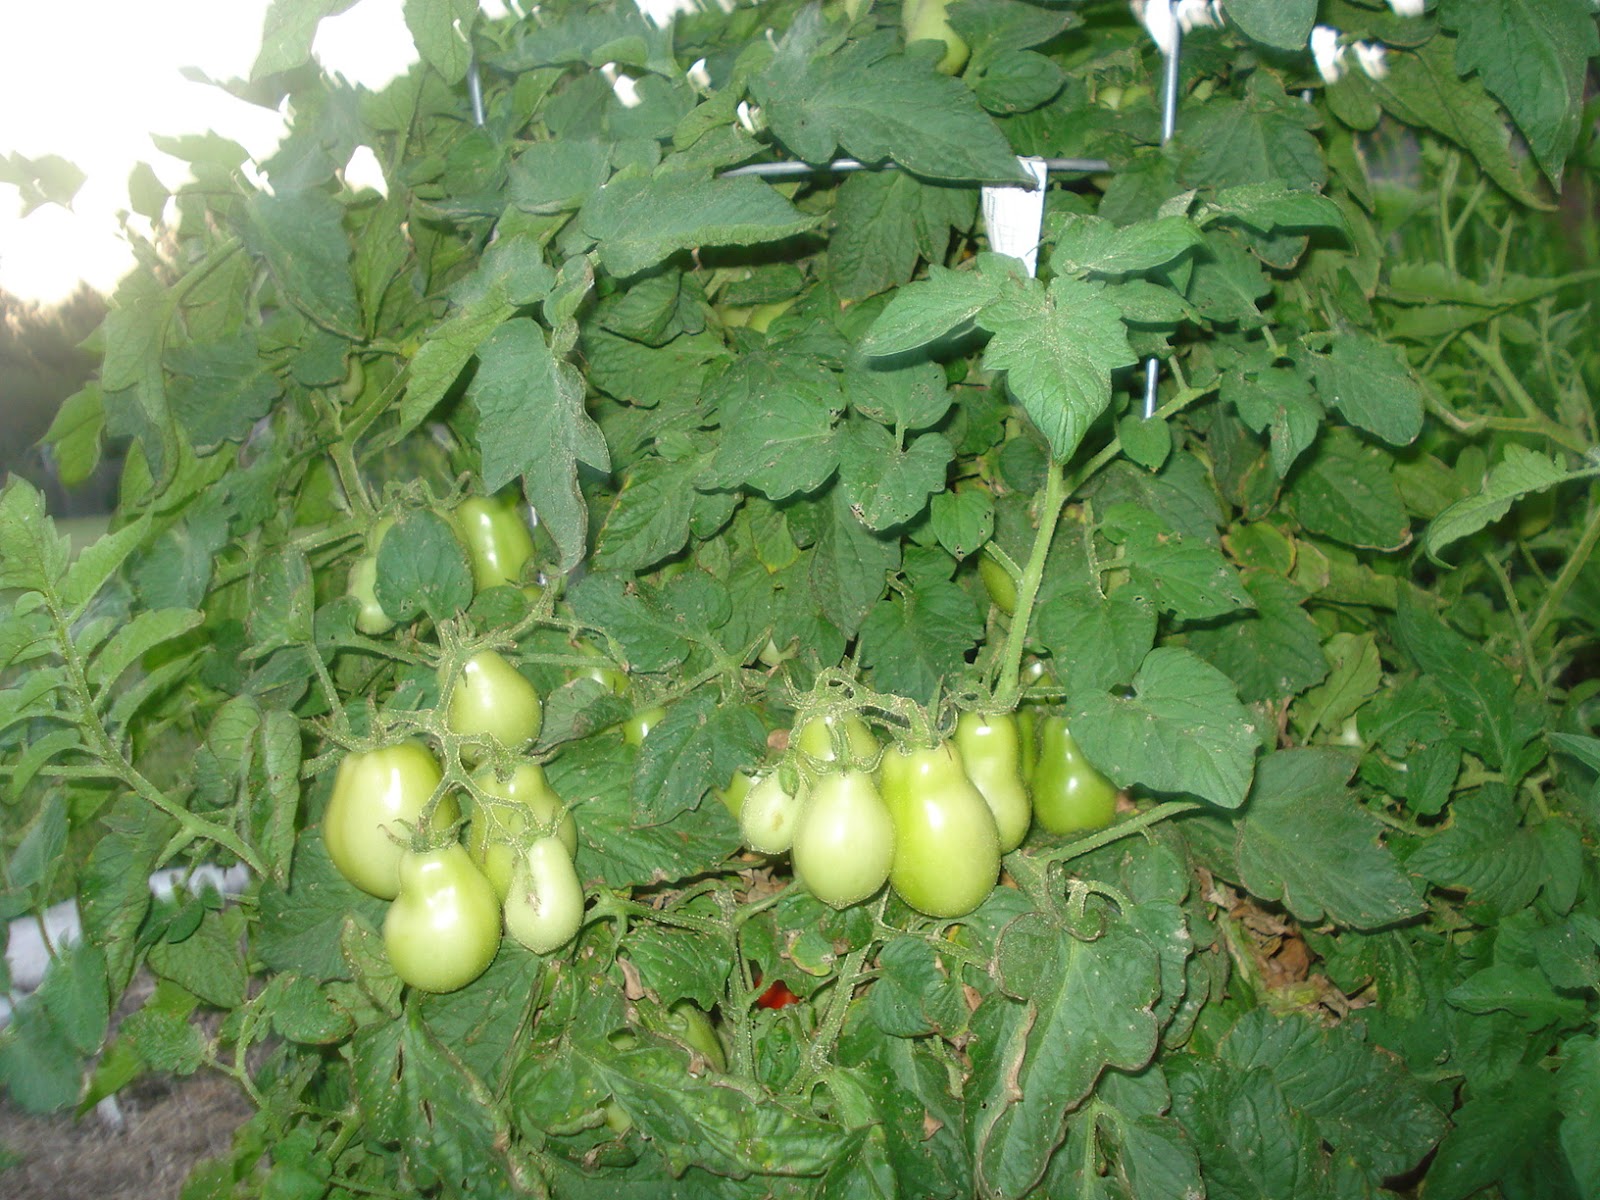
  • 24 medium beef steak or 48 roma tomatoes or a mixture of both
  • 2 cups chopped jalapeno's
  • 2 cups chopped green bell peppers (2-3)
  • 2 cups chopped onion (2-3)
  • 14 cloves garlic minced or I use minced garlic from the jar.
  • 1 tsp crushed oregano fresh
  • 2 tbsp salt
  • 1/2 tsp pepper
  • 2 tbsp sugar
  • 1 cup white vinegar
  • 6 oz can tomato paste

What you'll need: Supplies
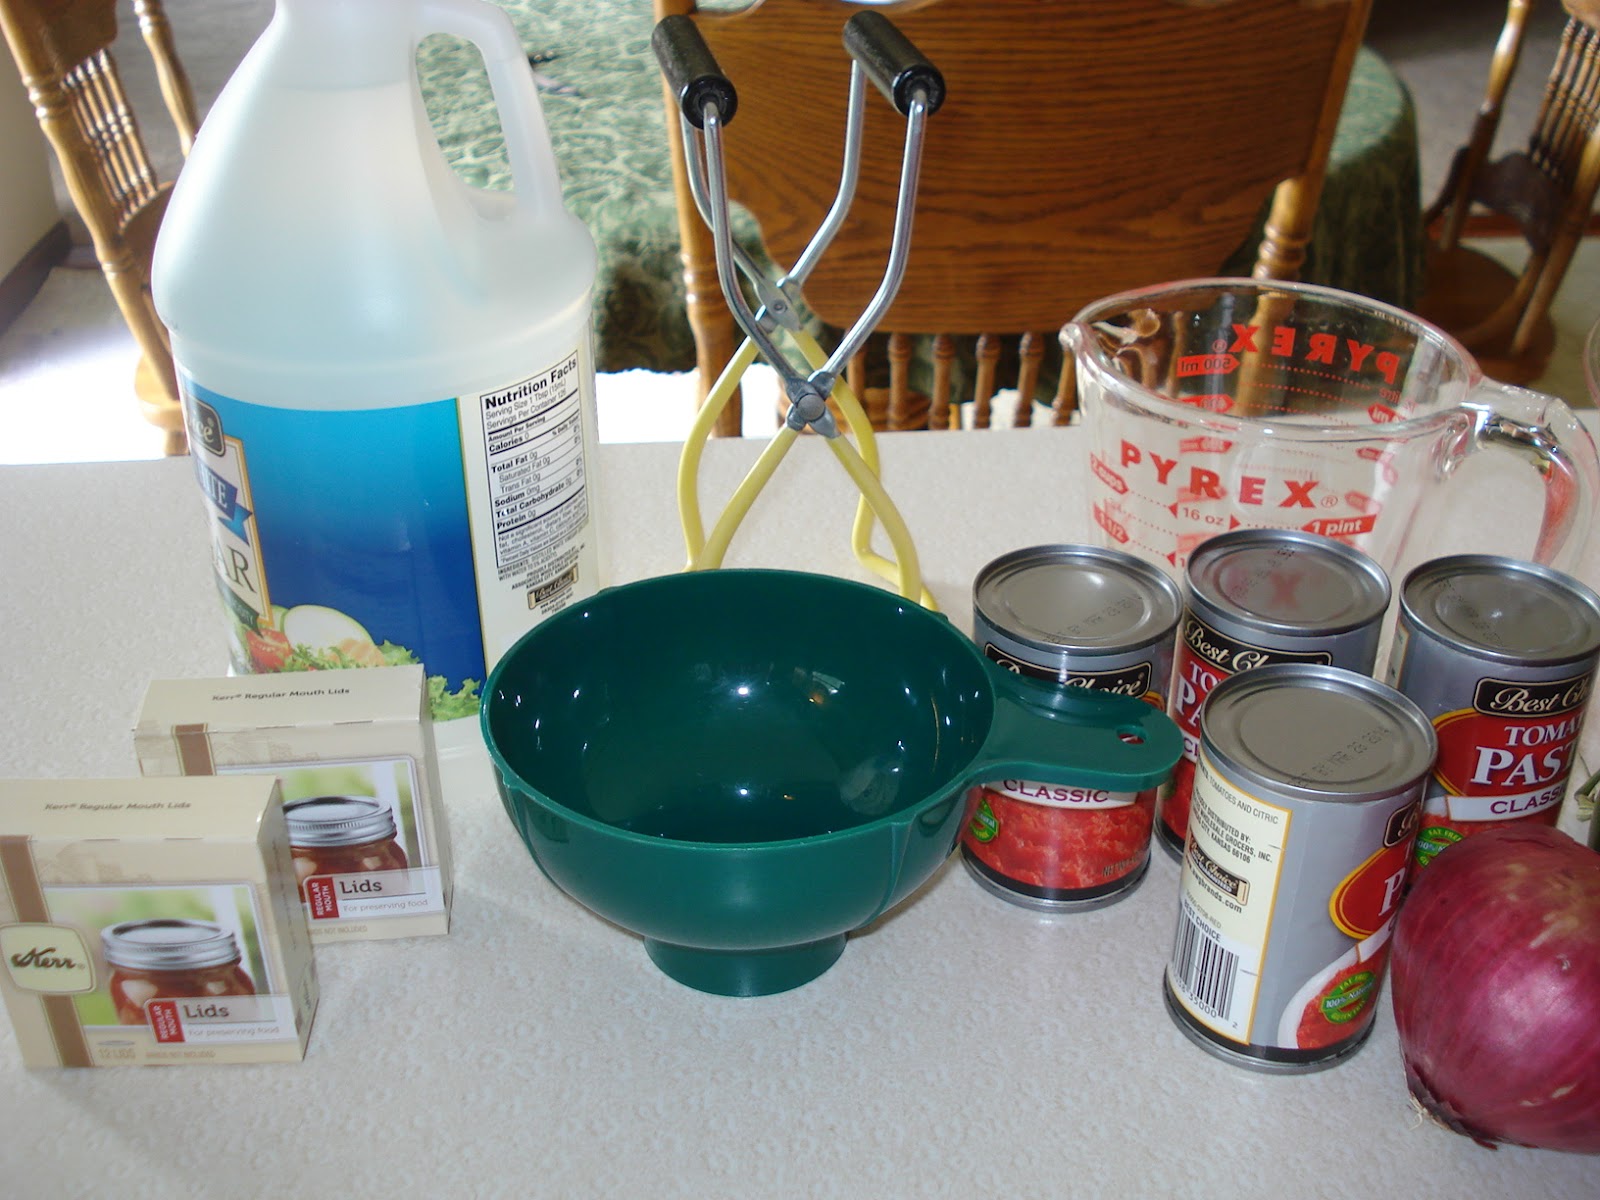
  • water bath canner
  • large kettle/stock pot
  • pint jars, lids & rings to fit. I use regular mouth jars.
  • jar tongs
  • measuring utensils
  • knives for dicing, vegetable chopper
  • cutting board with cookie sheet under it catches juices
  • spoons
  • cooling rack
  • paper towels
  • jar funnel
Blanch the tomatoes.
Dip them into boiling water in a large kettle for 30 seconds. Remove from boiling water and immediately dip tomatoes into cold water. I fill my sink with water and add ice cubes.


On the roma tomatoes I cut the stem end off and pinch off the skin. The tomato should slide right out. For other tomatoes cut out the core and peel. I blanch a pot full then ice them and then peel. Continue doing this till all tomatoes are peeled.

Now is a good time to fill canning kettle 3/4 full of water and start to bring it to a boil. It will be important to keep water boiling once jars are in the canner. With at least an inch of water over the top of the lids.

Chop your tomatoes. I like chunky salsa so I don't cut them too small.


Core other veggies, chop getting rid of seeds. Again, I like chunky salsa. You can place them in a blender or food processer for a smoother mixure. Place canning jars and rings in dishwasher and wash. I find the chopping more enjoyable if shared with my furry friends.

Add all ingredients to the large kettle. Simmer for 30 minutes, stirring occassionally. By now the dishwasher should be done. It's time to pack hot salsa into hot jars. Don't burn your fingers. Leave a 1/2 inch head space. That is the area from the top of the jar to the salsa.


Wipe the rim of the jar with a paper towel. Be sure the rim and outside of jar are clean. Rinse and completely dry lids. Make sure rings are dry as well. Place them on the jar. And place jar into canner using your tongs. My canner holds 7 jars. Place lid on canner.  Bring to a rolling boil and time for 20 minutes.Make sure water is at least 1 inch over the top of the jars. Take jars out of canner and place on cooling rack. Do not set them where there is a breeze and do not handle for 24 hours. Check to make sure your jars have sealed after the 24 hours by pressing on the lids. If there is give your jar has not sealed. Not to worry. The salsa is still good. You just need to eat it right away. Share it with your friends and family. Be sure to label your salsa with the date. I use a Sharpie marker right on the lid.

And that's it. As you know my veggie garden is recipe specific. I don't always get the bell pepper I need and have to run to the store and the salsa tastes just as good. If you like your salsa with a little more kick add the seeds from the jalapeno's. And watch the tears flow.  Happy Canning! Linda

Saturday, July 21, 2012

Maxi Skirt Refashion

I have been super busy crafting, baking & sewing but I needed to take time out to perform my civic duty. For the 3rd week in a row I am working at our local election office. There are important issues out there so don't forget to get out and vote August 7th! That leads me to this new blog. I have met some wonderful ladies and I promised I would blog about this maxi skirt I wore into the office one day. This is for a budding sewer. It will be easy and fun to wear to school this year. I apologize I did not take photos while making it originally so what you see is the finished product. And like I said I have been busy so it came out of the dryer wrinkled and I have not taken an iron to it. Busy Mom's/Wives Unite!! HA HA anyway, onto the tutorial.

This is what you'll need:
  • I used 3 adult men's polo shirts. They are thicker than a t-shirt most of the time. If you are taller than 5'3" you'll need more shirts, if shorter, then less shirts. I also choose medium because it fit around my hips comfortably. Pick your size accordingly.
  • thread
  • sewing machine
  • scissors or rotary cutter and mat
  • enough elastic to go around your waste
The original polo shirts I started with were similar to this. Lay them flat on a table one at a time. Cut off the lower part of the shirt at the armpit. I like using the rotary cutter and mat for this as the ruler gives me a nice straight line. However this is just as easy if you draw a line with a pen and cut with scissors. Do this to all shirts. You now have 3 fabric tubes. Decide what order you want your shirts to be in. I chose from top to bottom; brown, brown stripe & blue. From my 3 shirts bottoms I then cut them in half. So now I had 6 pieces (tubes). Cut off the hem of all shirts except for the piece that will be the hem of the skirt. With right sides together pin & sew your pieces together, ending with the hemmed piece at the bottom. Press seams open as you go.


Now we'll make the casing for the elastic waste. I used 3/4" wide elastic with an inch for the casing and 1/2" seam. This is how I did that. Judge what length you want your skirt. My skirts' finished length is 36 1/2" long. I added 1" for the casing and 1/2" for the seam. Then I cut the remaining fabric off. So now I have a skirt that is 37 1/2" in length. Turn the top under to the inside 1/2" and press. Fold down this area 1". Pin in place. Sew the the casing, making sure you leave an area open to insert the elastic. Measure and cut the elastic to a comfortable length. Insert it into the casing. Before loosing it all inside the casing leave the ends out so you can sew them together. This automatically gathers your wasteband of the skirt. Sew the opening to the casing closed.

 What I would reccommend you do now is open up a side seam at the bottom of the skirt to allow for easier walking. Just up to the knee should be far enough. Turn edges under and hem for a finished look. My short legs tend to take long strides and I did not do this. Ooops! It is on my to do list.

Enjoy your maxi skirt! If you make one send me a picture. I would love to see it!

Chocolate Zucchini Cake

Chocolate lovers unite! This is the perfect chocolate cake and this is the perfect time of year to use that fresh zucchini out of your garden. My Mom makes this for me on my birthday when we are together. Enjoy!!

Chocolate Zucchini Cake                 

½ cup soft margarine                      1 tsp baking soda
½ cup vegetable oil                         ½ tsp salt
1 ¾ cup sugar                                     ½ cup cocoa
2 eggs                                           ½ tsp baking powder
1 tsp vanilla                                         ½ tsp cinnamon
½ cup sour milk                                 2 ½ cup flour

2 cups shredded zucchini                             
1 cup chocolate chips

To make sour milk: 2 tsps lemon juice, fill to ½ cup with milk.

Cream together margarine, oil & sugar. Add eggs, vanilla & milk. Beat with mixer for 2 min. Mix together dry ingredients. Add to cream mix. Beat 3 min. with mixer. Stir in zucchini. Pour into a greased/floured 9X13 pan. Sprinkle chocolate chips on top. Bake at 325 degrees for 40-45 min. For a little added umph, I sometimes sprinkle powered sugar on top.

Sunday, July 8, 2012

Vacation Bible School T-shirt Refashion


Someone once told me my spiritual gift is organization. And I am pretty organized so this leads to leading. So I find myself, even though I don't have school age children anymore, in charge of our church's Vacation Bible School. In order to ramp up registration I decided to take a regular t-shirt and make it into a dress. This is what I came up with. I think it is super cute and want to tell you how you can make your own. Whether advertising an event or not. Have fun!
This is what you"ll need:
  • t-shirt with your favorite logo your size
  • t-shirt of the same or contrasting color as I choose in a size big enough to be the skirt
  • t-shirt for ruffles & belt
  • elastic for wasteline
  • scizzors or rotary cutter & mat
  • thread, I used the teal color just for fun
  • pins
  • tape measure
  • sewing machine

Find a sleeveless shirt you like how it fits. This will be your guide on how you cut out your logo t-shirt. Lay your logo t-shirt flat with the sleeveless shirt on top of it. Cut your shirt out leaving enough for seam allowance. Leave the original shoulder seams intact. Remember a ribbed t-shirt can really stretch so if you are using it as your guideline leave an inch or much more as an allowance. Don't make the mistake I did. In a hurry before a Royals game I thought I would whip up a new shirt to wear from one of my T-shirt Tuesday Royals shirts. I cut one way too small then tried again and cut the second too small. So be careful. You can trim the size down if it's too big in the end but you can't add to it if it's too small. Be sure to make your cuts around the neck & sleeves neat as this is your finished edge. No seam allowance is necessary.


Now find a skirt you want to use as your guide for the lower half of the dress. This is one of my favorites. And as it has a ruffle on the bottom I used it as my judge on length since we will be adding a ruffle to our new dress. Lay out your t-shirt you want to cut and lay the skirt on top of it. I stretched out the elastic wasteband to see how wide to cut the top of the skirt as we will be gathering and using elastic for the wasteline. I marked the fabric with an ink pen as we will be cutting into the marked area.


Seperately, pin and sew up the sides of the top portion and the bottom portion.


I believe my elastic I used was 3/4" wide. I might use 1/2" or 1/4" elastic the next time. The 3/4" just seemed a little bulky. Make sure it fits around your waste comfortably. Choose a starting point on the skirt portion of the dress. Take the elastic about 1" down from the wasteband on the wrong side. Do not pin it on. I sewed a few stitches and then pulled the elastic tight and continued to sew. When you've gone almost all the way around overlap the ends and continue to sew over it. Once you let the elastic go it will act as if you gathered the skirt.


Take your top portion and decide where you want your wasteband to be. I put the top on and pulled the skirt portion up and pinned where I wanted the top to match the bottom. I gave myself about 1" allowance and then cut below the wasteline, saving the portion I cut off for later use.


With right sides together, pin top to bottom at wasteband. Stitch. Because I was trying to hide a bit of the emblem from the t-shirt I used for the skirt portion, I stitched as close to the elastic as I could.To help me match the gathered bottom to the ungathered top I put one side of the skirt/top on the arm of the chair to stretch it out so I could evenly spread the fabric around. Trim any excess fabric. Now you have the base of your dress done.


Take a measurement around the neckline of your
dress. Now double this number. From the additional t-shirt, I choose one the same color as my light blue shirt, cut a 3/4" strip. Gather this
piece to fit around the necklineof the dress. Place
 it just on the edge of the neckline and stitch down the middle.


Time to make the bottom ruffle. Cut  3" wide strips from the additional t-shirt. You'll have to sew them right sides together to make a long enough piece double the area around the bottom of the skirt. Gather the ruffle 1/4" from on of the edges. Match it to the bottom of the dress. Sew it to the bottom of the skirt.


To make a belt I cut 2" or 3" wide strips longer than a tied on belt would normally be. Sew the 3 ends together so it was easier to braid.


Braid the pieces. Sew across each end to secure. I wanted to make this a super easy dress to make so I went casual and just left the ends like this. You could purchase belt ends or use some from an old belt to apply to the ends to make it a little more finished.


And that's it. I have washed my dress once already and the unfinished arm holes and edges of the ruffles look good. It actually improved the look of the ruffles. I hope to make another dress similar to this but change it up a bit. Check back in to see how I've done. If you make this dress, send me a picture. I would love to see how yours came out! Linda

Wednesday, July 4, 2012

Happy 4th of July Flag

I wandered around the garden centers and craft stores and could not find a little American flag to fit on my garden stand. So I decided to make one. Here's what you'll need...     1/4 yard red fabric, 1/4 yard white fabric, 1/8 yard blue fabric, thread ( I used white), scissors or quilters mat & rotary cutter and a sewing machine. My fabric is 100% cotton. An outdoor fabric would work best as it will hold up to the elements better. Wash and iron your fabric. I folded my fabric in half to cut two pieces at a time.
After folding in half trim selvages even.
Cut 2" strips lengthwise.

From your 2" strips cut 2 (double layered)- 18 1/4" long & 2 (double layered)- 11 3/4" long. Do this with both the red and the white fabric. You should now have 4 strips 18 1/4" long and 4 strips 11 3/4" long in both the red and white fabrics. I'm sorry I didn't take a picture of the strips to show you. (Things a blogger needs to learn) Set your red and white strips aside and grab the blue fabric you have prewashed and ironed. Fold in half so you are cutting 2 at a time. Trim selvages if needed. Cut a 6 1/2" X 7" piece. Set this aside. Remember we are constructing a front side and a back side of the flag. So now you will have 2 blue fields.


 We are ready to assemble our flag.

With right sides together stitch 1- 18 1/4" red strip lengthwise to 1- 18 1/4" white strip. I used 1/4" seams for all of this project.


Press seams toward darker color fabric.

Now add another 18 1/4" strip of the opposite color. Just remember you want your strips to be red, white, red, white. I quilt so am using quilting techniques. When you piece strips or pieces of fabric for a quilt you switch direction your stitching goes. So we'll say we ended the first section of 2 pieces at the bottom. When you add your 3rd piece stitch from the bottom to the top. then on the 4th piece you'll stitch top to bottom again. This makes the pieces lay flat and not pucker. So now you should have a section of red and white 18 1/4" strips sewn together. Repeat this step with the other 18 1/4" strips for the other side of the flag.

Now using this same process sew your 11 3/4" strips together.

Now it's time to add our field of blue to each 11 3/4" section. Match up the 6 1/2" length to the strips 6 1/2" width. Sew together.

Don't worry if your strips are not the exact same length or your field of blue hangs over a little. This will all be fixed in later steps.

 Now sew blue field/stripes section to longer stripes section. You now have achieved the above. ***NOTE***When sewing the opposite side the blue field will want to back the other blue field, white to white and red to red so piece accordingly. If the edges that are a little longer than others bug you, you can trim them up.

Take both sides of your flag and with right sides together match the blue field so it backs to the blue field and red stripes to red and white stripes to white. Using a 1/4" seam again, sew starting 2" from the top of the flag down that side, across the bottom and back up the other side stopping 2" from the top. Turn flag right sides out and press.

Press under unsewn area 1/4" as shown in the picture below.

Pin flag opening together. Top stitch around entire flag leaving a 3/4" opening on each side 1" down from top.


Being careful not to stitch your opening closed, top stitch your flag to your liking. I choose to stitch 2 rows 1/4" apart around the flag. Then I stitched in the white stripes 1/4" from their opposing fabric. And finally to reinforce where the bar goes thru the flag I sewed across the flag top and bottom of opening for the bar. You could get some spray that would make your flag water repellant to help its lifespan. Hang your flag with pride! You did it! Happy 4th of July!       Linda


In the Garden

The Garden is growing like crazy so I wanted to share some pictures with you. This is my disclaimer...I am not a photographer, my pictures may be blurry and out of focus. Ha ha, so otherwise enjoy. As you know I garden to make salsa, however I do throw in a few other vegetables. These are pole beans. I had the great idea of cementing a 4x4 post in the ground and adding decorative elements to the top. A few cup hooks top and bottom and add string and let the beans climb. Then I asked my husband to help me put the pole in the ground. So now I have man thinking in the mix. ;) I ended up with a pole that sticks 8 feet out of the ground. I am 5'3". Yes, allot of the beans at the top never get picked. Not to fear though. Next year I am going to screw cup hooks in the pole at about the 6 foot level. Of course this solution never dawned on me before. It was just so fun to watch the beans grow skyward.


Spaghetti squash are easy to grow. But they do take up allot of room in the garden. If you have any good recipes you'd want to share with me for squash, I'd love to have them. And I'll share my squash with you too. I have way more than what we can eat.


I do have a compost pile and would love to have a compost container. You'll have to ask my husband what happened to the old container we used to have. It's a funny story. My ideal container would be one that is supported on legs that you turn a crank to stir the compost. It's on my wish list. But back to the compost pile. I don't stir it as I should and late this spring I threw sod on it I had dug up. I haven't stirred it since. I soon noticed something growing off to the side. It looked allot like my spaghetti squash so I almost pulled it out. But as I love to watch things grow I left it alone. To my surprise I realized it was another member of the squash family. Acorn squash. Yum. Cut it in half, bake and for the last few minutes turn up like a bowl and add butter and brown sugar. I can't wait to see how my home grown acorn squash tastes.


Now to my favorite plants. Tomatoes! They are doing well all things considered. The heat is really taking a tole on them, but they are heavy with fruit. Enjoy my photo gallery of tomatoes on and off the plant! Roma's, Early Girl & Heirloom Mr. Stripey. I'll be making salsa later this week!
As you can see the tomatoes just keep coming. And don't let that little pile of jalapeno peppers foul you. There are allot more in a bowl on top of the fridge. My poor bell pepper plant is still sickly but it does have new growth on it. Thanks for taking a tour of the garden with me. I like to go out there in the morning when it is cool and the world hasn't quite woken up yet. During this peaceful time I reflect on how good God has been to me. I hope you enjoy some of His goodness today too! Linda
Related Posts Plugin for WordPress, Blogger...