Wednesday, May 15, 2013

Mother's Day

We are so lucky to have wonderful women in our lives. They love us, raise us, teach us, train us and of course pass along many talents. I found this Mother's Day gift idea www.graphicsfairy.com . Here is how I did mine.

I bought 2 square glass platters at Target.
Chose stencils I liked. In this case I used initials and something to dress up the corners. You can find stencils at your local hobby and craft store.
You'll need glass paint. I recommend Martha Stewarts gloss opaque. I chose black.
A foam spouncer and painters tape.
Rubbing alcohol

Clean your platters with soap and water. I had to use Goo Gone as the price tag was right in the middle of the platter. Now use alcohol to clean off any oils or finger prints. Let dry.

Tape your stencil to the back of the platter. Remember to reverse it so it will be viewed correctly when it is right side up. I poured a little paint into a paper plate and used my foam spouncer to dab into the paint then get the excess off. You want to use a dry technique. Less is more. If you try to apply too much paint it will bleed and your stencil design will not have a clean look. If you work quickly you won't need to clean the stencil off if you plan to put the same design in another spot.
 
 
Once you've finished stenciling it's done. Cure for 21 days or bake. Baking is faster. You need to put the platter into a cold oven. Turn the temp to 350 degrees and let the platters warm as the oven does. Once it reaches 350 set the timer for 30 minutes. When it is done again leave the platters in to cool as the oven cools.
 
 
Wait 72 hours before using. This is dishwasher safe for top rack. I don't think I would try to bake with it.


So easy and just beautiful!!
 
Happy Mother's Day!
Linda


Finished Bathroom

Wow, I can't believe it. We started this project March 4th. And now on May 15th I'm taking the final pictures. But again I am getting ahead of myself.
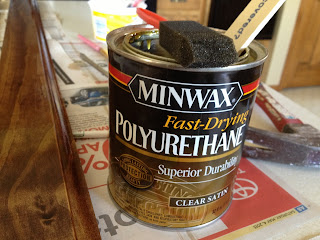
I bought new baseboard because as you remember previously the tile went up the side of the wall. I thought this made it look too industrial so wanted to warm the room up with wood tones. I experiment with trim colors to come as close to what the rest of the trim is that I can. In this case I used a red elm gel stain by Minwax. Once dried I decided it wasn't quite right so I added a coat of American oak stain. This was not the gel kind. I felt the color then was close so applied 3 coats of polyurethane.
 
Once completely dry I measured with the help of my friend Susan. She wrote down the measurements. She came over to observe and chat as she is recovering from rotater cuff surgery. Ouch!! Get well soon to Susan!
 
I had handyman Earl come back to caulk around the sink and tub. I am not a caulker. This is a skill I leave for others. I choose to use clear caulk as I did not want to cover that beautiful granite with a color that would not match. Earl highly recommends using a silicone. This will not shrink or get dry and brittle like the "siliconized" caulk does.
 
I also want to give a big THANK YOU to our friend Ken. Electrical is sometimes best left to the experts. We were having trouble getting the new lights hooked to the switches so Ken volunteered to come and help. YAY!! He's an electrical engineer. Who better to have. Within and hour he was done and I could move on with the project.
 
Back to baseboards. Earl told me how he would do it and then I did it how I wanted to. :) I mitered the corners. I'm happy and it's my bathroom so....Anyway, I love using power tools. Nothing like a finish nailer to get the job done quick and easy. Fill those little nail holes with wood filler and let dry. Touch up with a dab of stain and baseboards complete. I did purchase quarter round for along the vanity. I painted it the vanity color and nailed in place again miter cutting the corner.
 
Hubby installed the tub/shower faucets and I think that's it. What a journey. So happy with it and my son is happy he has his bathroom back. So below is the before picture.
 
 
And here is the after!
I think I am happiest with the floor. Definitely my best work.
 
The baseboards look awesome.

Rid of the huge builders grade mirror and poor lighting!


I love the vanity color.

 
And what man doesn't like a dual flush toilet?

 
Yes that is dirty laundry in the basket already. :)

 
All I need is a couple of pieces of art for the walls and I am set. It has been a trying journey. Not everything went smooth but it was all worth it. This is our forever home. We intend to enjoy every minute we are in it. God has blessed us in so many ways and he has blessed me with you. Thanks for coming along with me on this adventure. I should have more time to do other projects now so check back soon!
Linda


Wednesday, May 1, 2013

Bath Remodel Days - Time for Paint, Countertop & Fixtures

Wow, I can see the light at the end of the tunnel. I had Earl my handyman come. He skim coated the walls where I had taken the big mirror down plus repair areas where I took tile off in the baseboard area. Now I'm ready to paint. I applied two coats of primer and two coats of color. I was a little worried the walls looked too dark but once I painted the vanity it all seemed just right. Below are several pictures of the finished walls.

I got the paint at Sherwin Williams but the color is Pebble Gray in a semi-gloss finish. It is a Glidden color from Home Depot. I always use Latex paint. The clean up is so much easier. And don't forget in between coats no need to clean brushes and rollers. Simply wrap them in cellophane and put them in the refrigerator.
 
Looking at the picture above I should mention that I did get the grout done on the floor. I think it turned out awesome. Floor tiling is my specialty.
 
 
You've seen the wood vanity...it's now time to give it a fresh look. I also got this paint from Sherwin Williams. The color is a Behr color from Home Depot. Sherwin Williams had a sale on paint, that is why I purchased it there. I think Home Depot's paint is just as nice a quality. The vanity paint is a latex enamel in a satin finish. This will work beautifully on the wood. I took advantage of a beautiful day and sanded the doors and drawers outside using my palm sander. My goal was not to take it down to the bare wood, but to get the varnish or polyurethane off. And of course in the process it did get down to the bare wood in places. Sanding some of the corners and tight areas by hand was needed. Some people like to put a coat of primer on their wood projects but I learned the hard way that this was not what I wanted. However if you have your primer tinted the color of your finished color it would work just fine. But just know if you use white primer on it and then your finish color if your family "lives life" as mine does a chip or scrap is going to happen and then you can see the white primer under it. So with that said, I didn't use a primer at all. Two coats of a high quality paint and you are set.
 
I'm getting ahead of myself. After I painted the walls, hubby got to work installing new lighting!! Mark where you want to fixtures, cut out the drywall, run the wire & attach the new light fixtures. Sounds easy right? I don't do electrical that's why I leave it to hubby. :)
 
 
Tonights' last project was to install the granite countertop. We bought it at a Surplus Store and it came with the sink attached. We had to have it cut down 1" on each side and then the installation was a snap. Dry fit to make just make sure and then a little liquid nails on each corner of the vanity and that's it. The backsplash went up just as easy.

The sink works!! With any luck the wiring will be run to the switches for the new lights, fixtures for tub/shower installed and new toilet placed. I ordered the pulls for the vanity from an online place and they came in just 3 days.

The next time you check in on me you'll be seeing the finished product. I can't wait! See you soon.
Linda


Fun Summer Party Dress

The weather isn't really cooperating but it is supposed to be Spring and that means Summer is right around the corner. With that in mind and the fact that I went on a shopping spree during the after Christmas sales and bought several patterns and some fantastic fabric. When everything on the clearance rack looks good, then I go for it. So even though I have been working away on the bathroom, I needed a break.

This is a Simplicity pattern. I've always felt they are the easiest to read. I never go by the body measurements they give however. Pick the size you typically wear and cut out the pattern. Make sure you wash and iron your fabric before you cut the pattern pieces out. Then jump right in.

I hadn't put in an invisible zipper in years. But it turned out great! The fabric is a cotton blend. After sewing it all together I tried it on to see if any alterations needed to be made. I brought in one side in the hip area and called it good. I will admit, I still need to hem it. Just above the knee for me. But I'm pretty happy how it turned out. The ruffle flounce is a little stiff and doesn't hang like a flimsy fabric would. A little tack in one or two places should fix that.
Once the hem is done I'll be wearing this beauty to a wedding in June. Check back in on me to see it in action. Maybe real action from the dance floor? Tee hee, check back in to see.
Linda
Related Posts Plugin for WordPress, Blogger...